MRI Radar Integration
Leadpro can send leads directly to MRI Radar. This requires that you enable the 'MRI Radar' integration, and provide a webhook endpoint from MRI Radar to receive the lead data.
Enabling an MRI Radar integration
1. From your Leadpro dashboard, find the 'Integrations' menu link from the left-side menu and click on it to access your system's integrations list.
2. Within the integrations list, locate the 'MRI Radar' integration (it'll appear as the screenshot example displays below), once you've found it, hit connect.

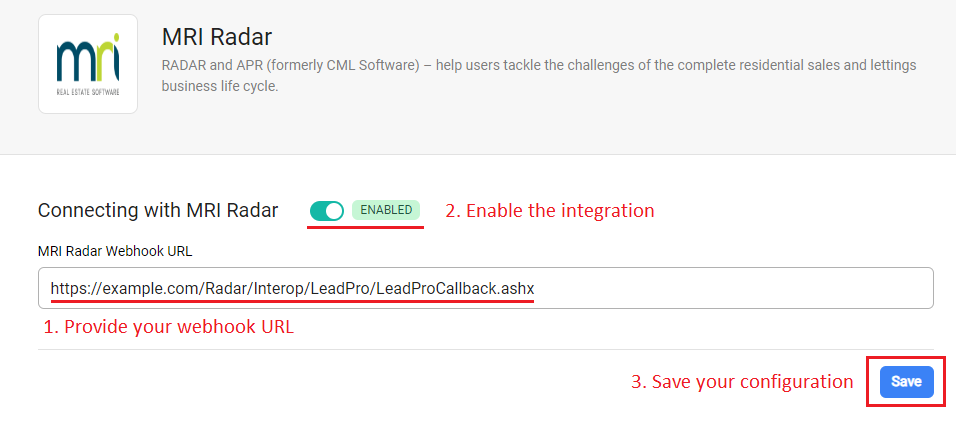
3. Now You'll reach the MRI Radar integration configuration page. This page contains an input field to provide a webhook endpoint form your MRI Radar software, and a switch to enable the integration in your leadpro system.
First, you'll need to acquire a 'lead' webook endpoint URL from your MRI Radar system. If you're unsure of how to do this, you can request help through the MRI Software Contact Portal. Once acquired, copy and paste the webhook URL into the input field, enable the integration by pressing the switch, and save your changes.
Using the MRI Radar integration
The MRI Radar integration is a 'manual trigger' integration. This means leads that are recorded into your Leadpro system will not be automatically pushed into your MRI Radar system. You can, however, quickly and easily push a lead from Leadpro into Radar with a single button click. The process to push a lead to Radar is as follows:
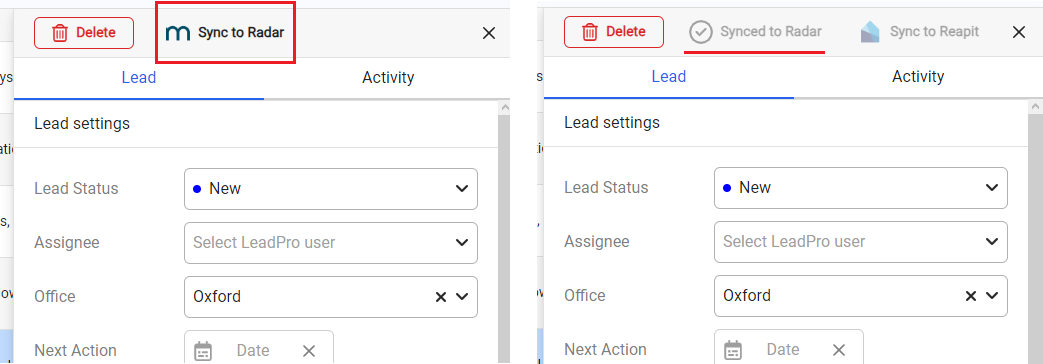
1. Click on a lead from your Leadpro dashboard that you're interested in pushing into MRI Radar, and move your attention over to the 'lead details' panel that opens on the right of the screen.
2. At the very top of the 'lead details' panel you'll find a button to synchronise the lead with MRI Radar. Press this button to push your selected lead into your Radar system. Upon success, the button will be replace with a status label confirming that the lead was synchronised, as the below example show.